
by Ellis Friedman Fitch
Picture the scene: You’re in Infusionsoft. You’ve got contacts uploaded and they’re just waiting to hear from you, but you’re not sure what to do next. If this sounds like you, you’re in the right place.
Setting up and sending your first email broadcast isn’t nearly as daunting as it seems. Sure, it could take a half an hour or so for you to write the copy and get the right look, but the email builder makes it simple with intuitive drag and drop.
A broadcast is different than an email that gets sent via an Infusionsoft sequence built in Campaign Builder; a broadcast is one single message that’s sent to a whole list of contacts at the same time. You can schedule broadcasts to go out on a specific day or time, but the schedule will be the same for each recipient. A broadcast is a good option for regular, uniform contact, like a monthly newsletter or updates.
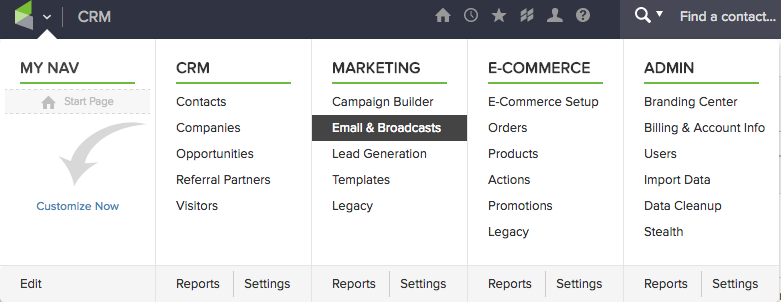
So let’s jump right in! Log into your app and hover over the Infusionsoft cornerstone logo. Under Marketing, select Email & Broadcasts.
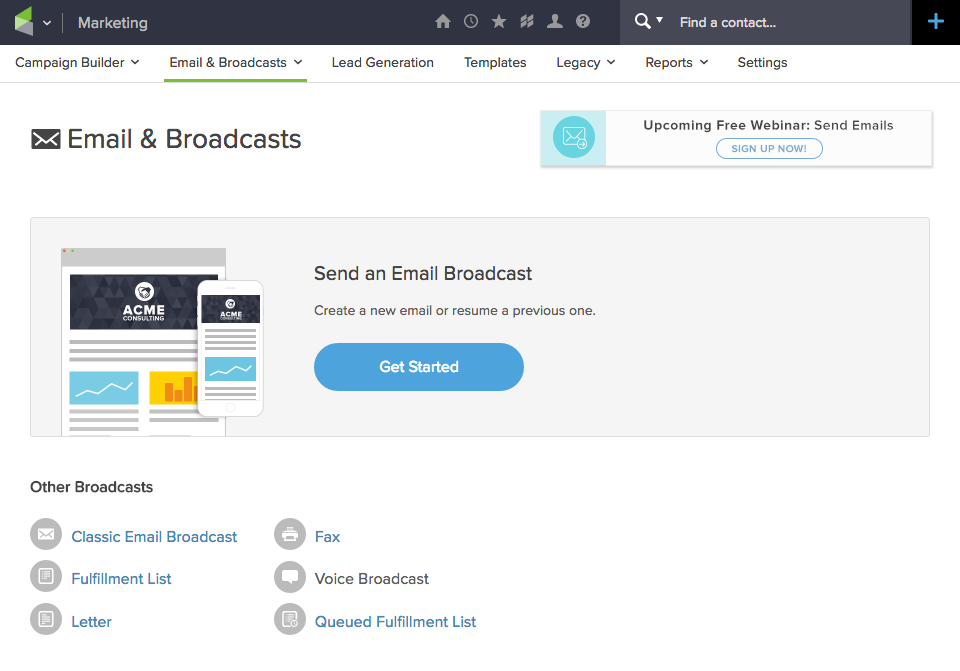
Once you’re in Email & Broadcasts, click the blue Get Started button.
The next thing you’ll see is our gallery of email templates.
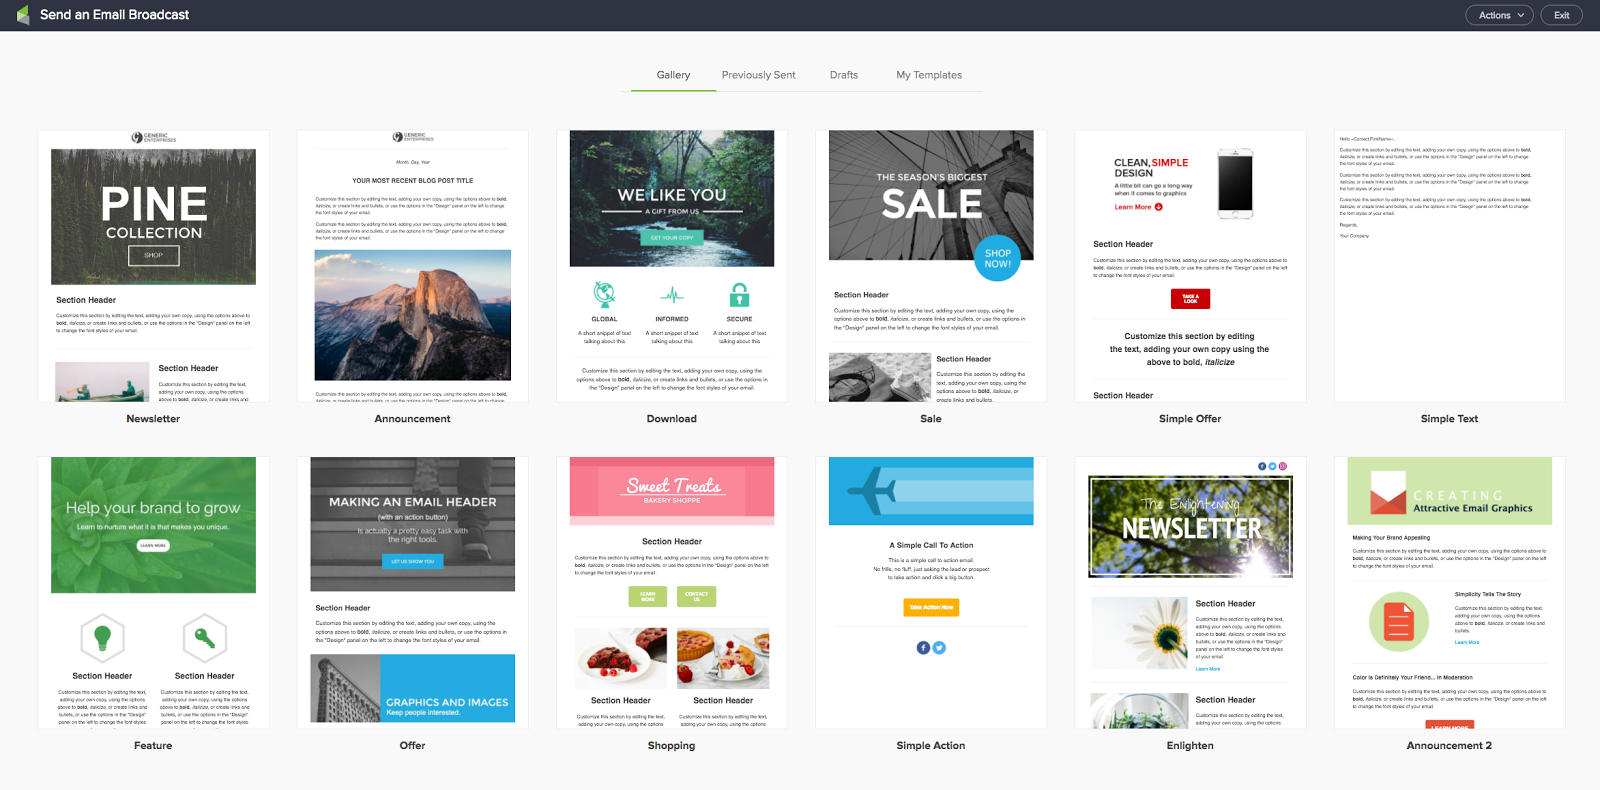
Take a moment to admire their beauty. Templates mean one thing: Less design work for you.
You have the following options:
- Previously Sent Emails, in which you can repurpose previous broadcasts you’ve sent
- Drafts, where any emails you’ve started but abandoned (by clicking the Save & Exit button) live
- My Templates, where you can save your own templates by going into Previously Sent, hovering over a template, and clicking the Save icon.
If you want to send a simple, plain text email, you can choose the Simple Text template. This is the no-frills, looks-like-you-just-wrote-them-an-email email broadcast.
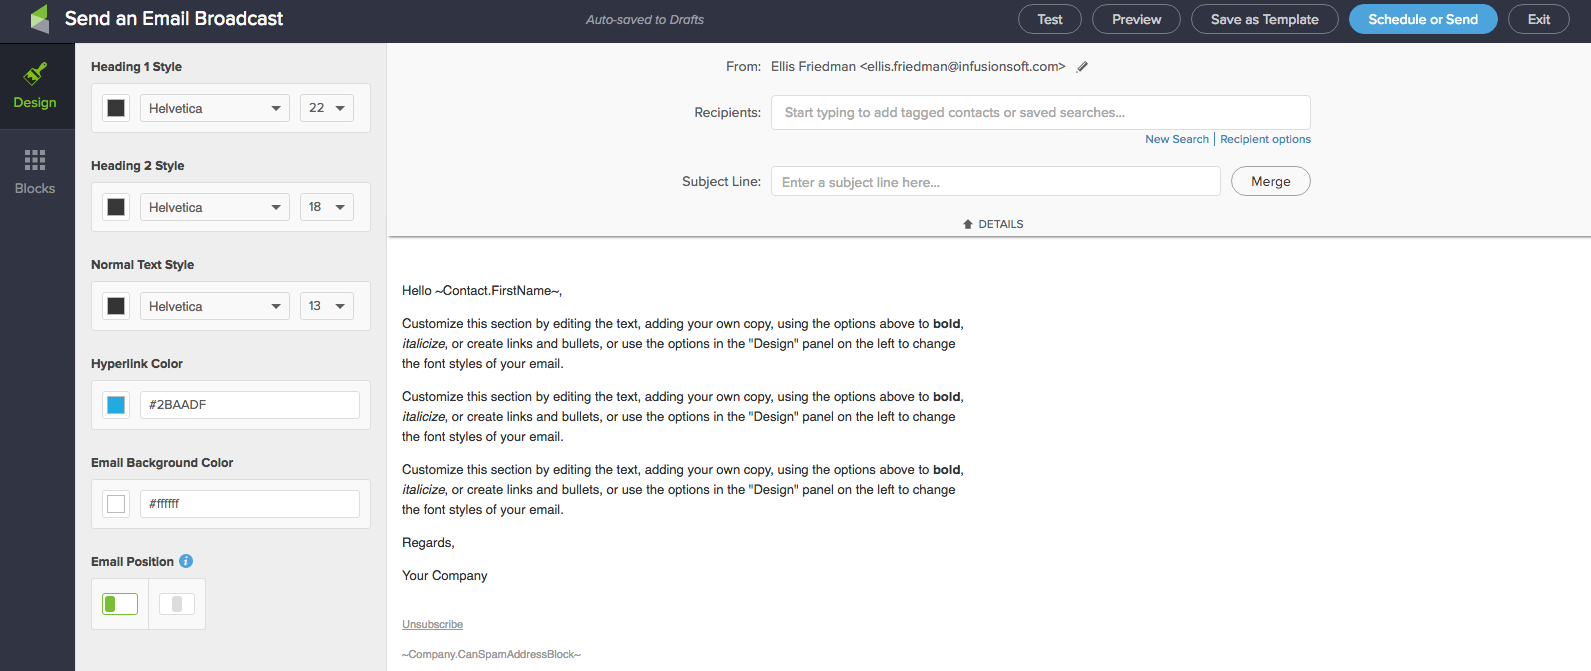
This one is ready for contact merges, and you can see by the “Hello ~Contact.FirstName~. That means your email will read “Dear Beth” or whatever the recipient’s first name is. You can adjust the mere fields by clicking on the text box. Then the blue bar will pop up and give you merge options. Click Merge.
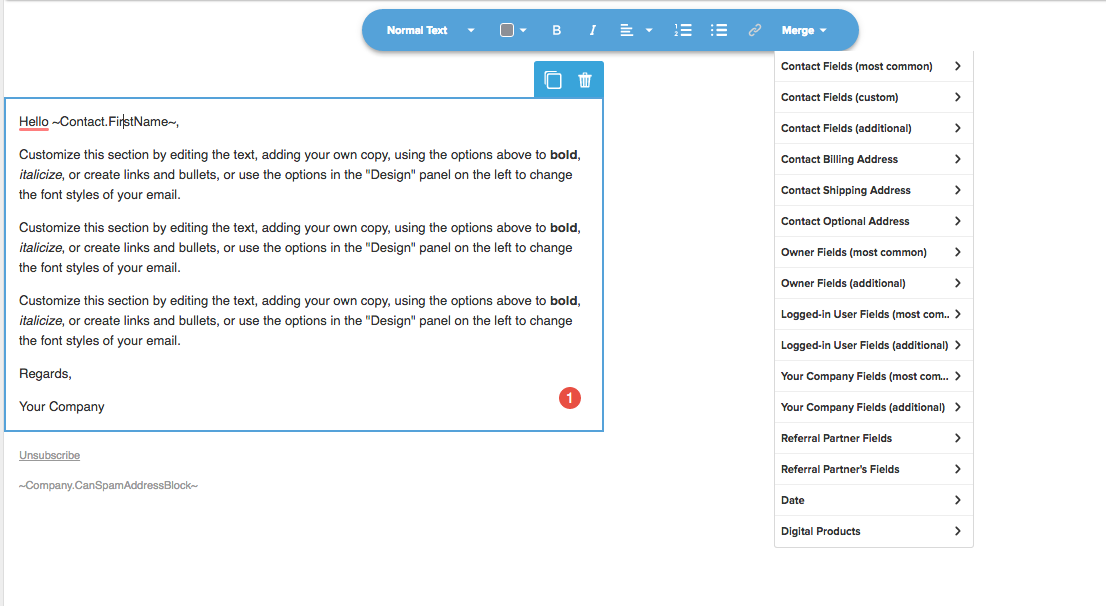
You can learn more about personalizing emails through merge fields at the Help Center.
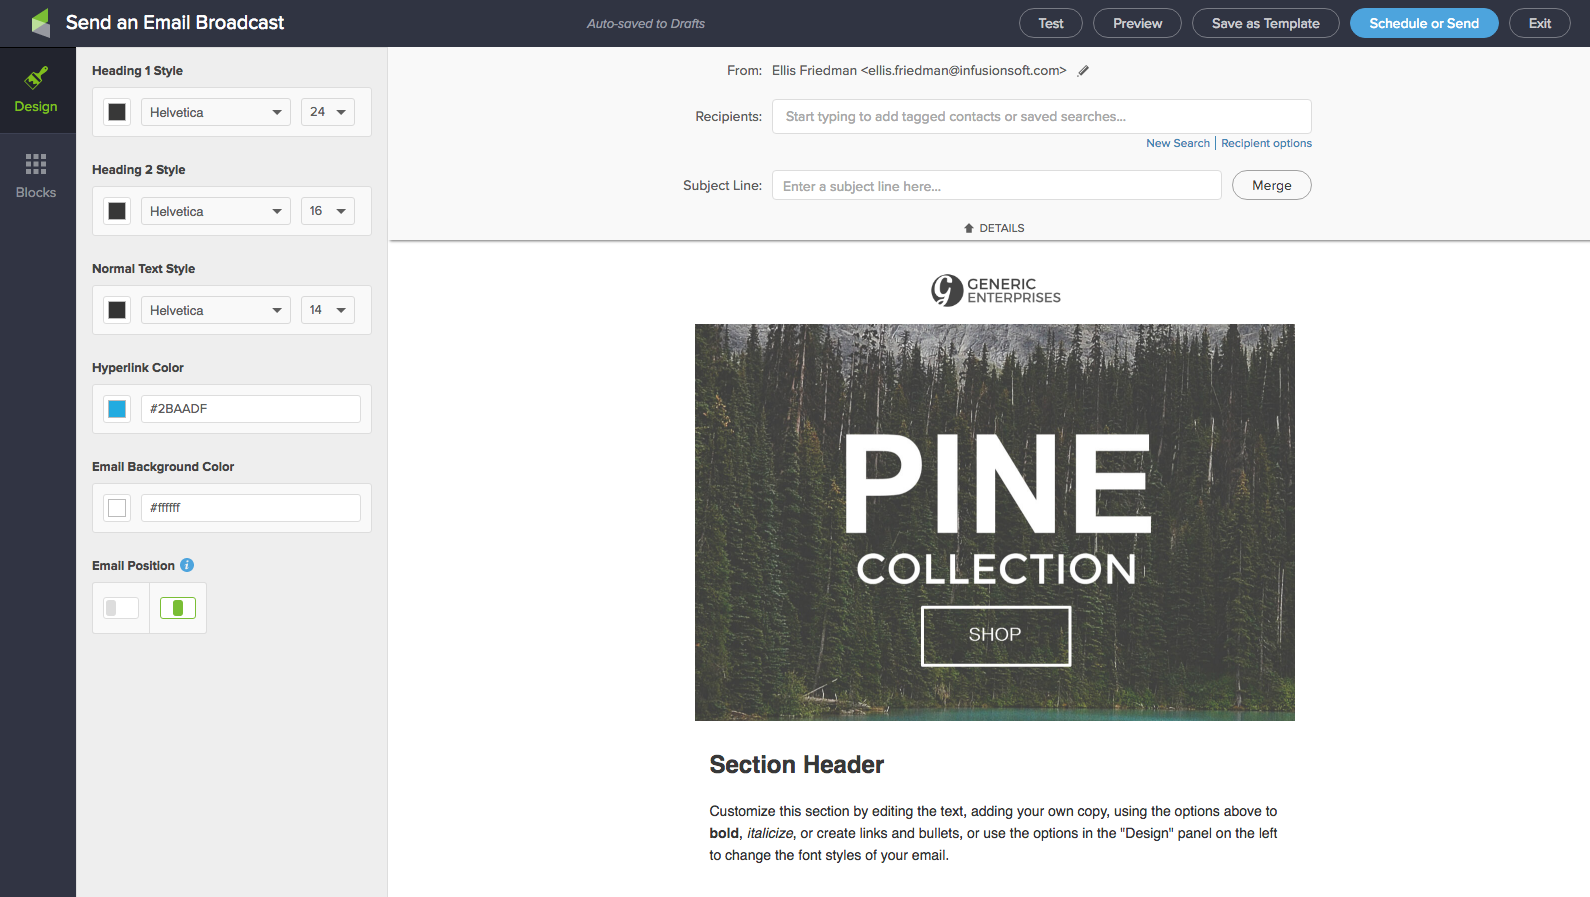
But let’s say you want to create a broadcast with a little more oomph than a simple text template. Let’s go for the Newsletter template, since sending a newsletter is a great way to keep people engaged with your brand and easy to replicate and send every month. Hover over the Newsletter template and select Use Template.
The order in which you do things now is up to you. I don’t like putting in recipients until everything is done (to avoid accidental premature sending) but you could do that first if you wanted. In this tutorial, I’m going to start with the body.
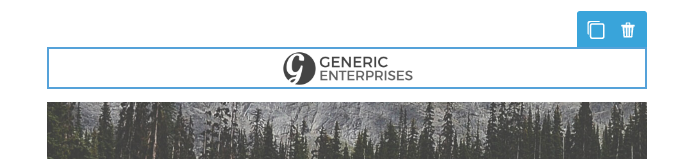
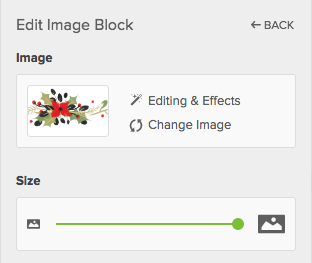
The excellent thing about these templates is that nothing is set in stone. You can completely delete items, duplicate them, or change them around. Let’s say you wanted to put in your own logo at the very top, where you see the Generic Enterprises logo. Just click that logo and the whole block will highlight.
In the bar on the left, click Change Image.
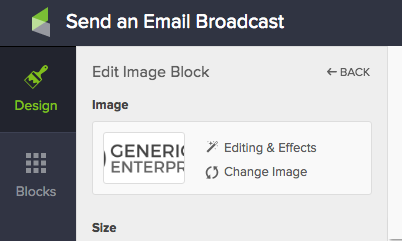
That will take you to a library of images you’ve already uploaded to Infusionsoft or from your computer. If you don’t have any images or your logo yet, check out our Help Center for how to do that. I chose this little garland:

However, it’s way too small. So just use the Size bar in the left menu to adjust the size if necessary.
Voila! I can also link the image if I like. In that same left Edit Image Block, click the dropdown menu under Image Link and choose the kind of link you’re putting in.
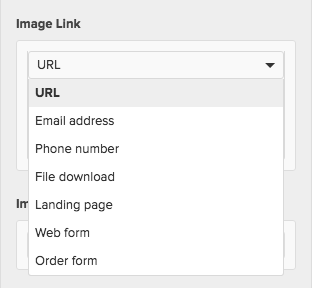
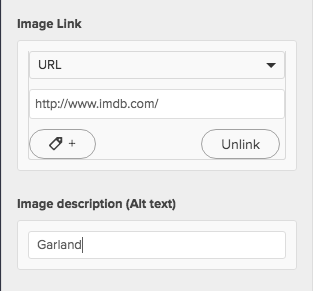
Then put in the link! My example email blast here will keep with the classic film star theme from uploading your contact list, so I’ll send the recipients of my email blast to imdb.com. While I’m at it, I’ll also put in alt text for the image, which is an explanation of what’s in the image, so that people know what it is if the picture doesn’t load for them.
Now you can follow the same steps for your main image. If you want writing on your image like in the template, or to make any other changes to the image, click Editing & Effects in the Edit Image Block.
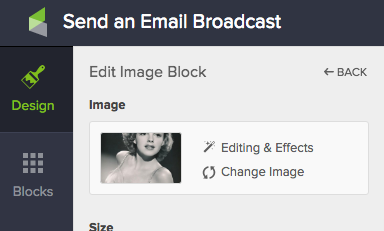
Notice that I’ve uploaded a picture of Judy Garland to go under the garland. It’s the little things. Anyway, once you click Editing & Effects, you’ll be in this window.
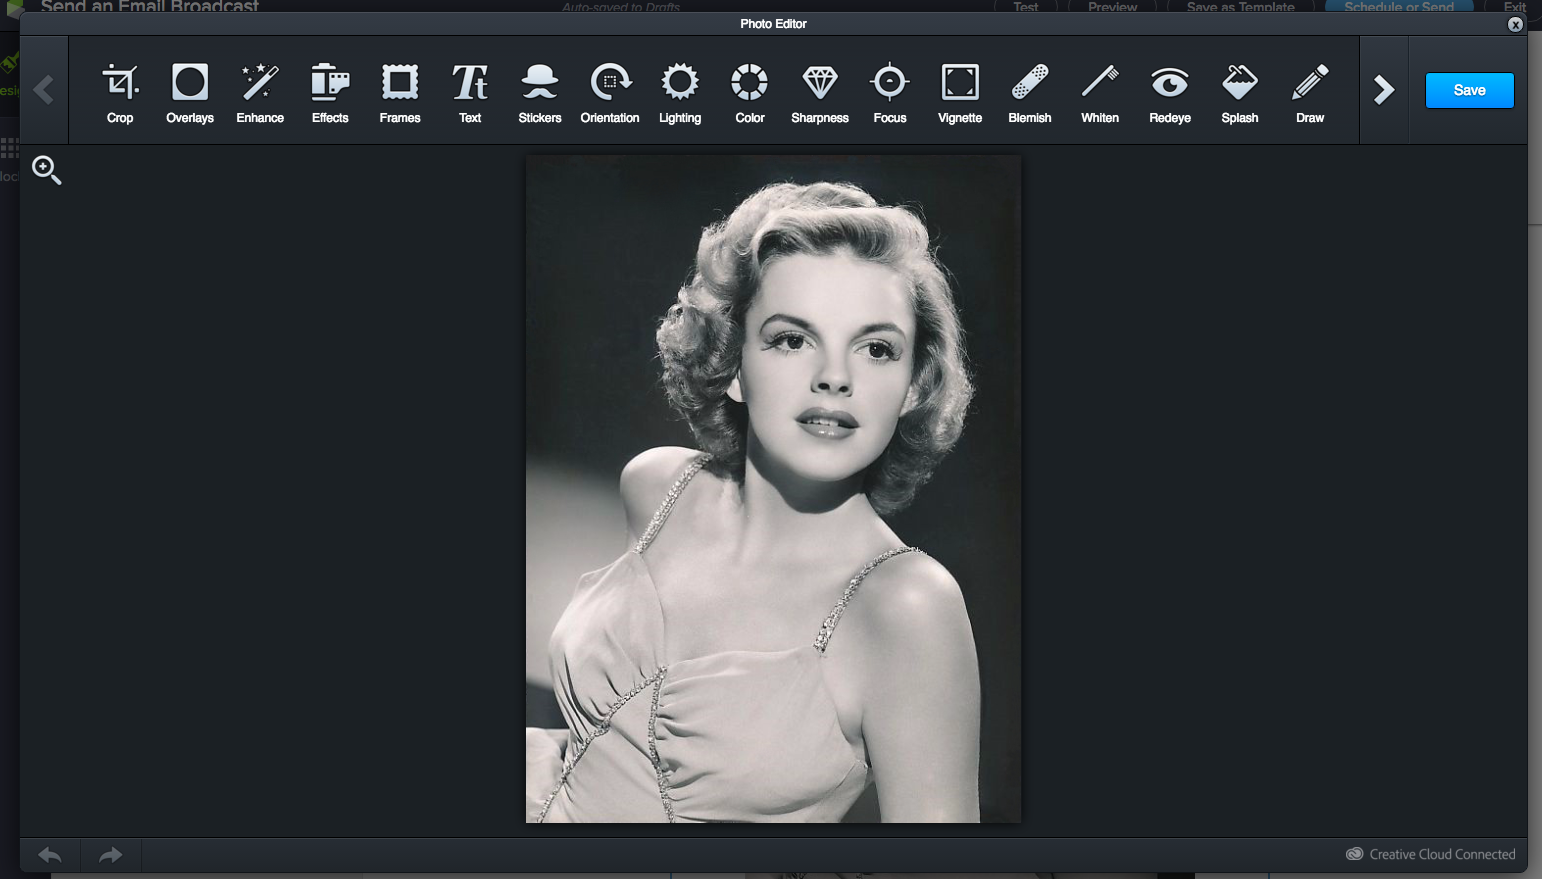
Then go wild and do whatever you want. If you’ve ever used any kind of online photo editor, you’ll get the hang of this pretty quickly. Here’s my final product:

It won’t win any design awards, but it will really get those garlands moving. And remember, don’t use photos you don’t have permission to use. This photo is from Wikimedia Commons and is in the public domain.
Finally, you want to fill in all the text spots in the template. Of course if you don’t have as much to say as there are text blocks, just delete the blocks by clicking them then clicking the blue trash can.
If you need head over to the Blocks button on the left bar, and you’ll get this, where you can add all the things you want:
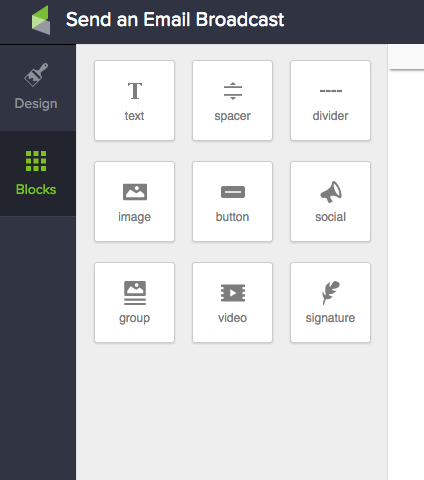
To add a new element, just click and drag it into your email template.
Now let’s add our recipients! A great way to do this is to add recipients by tag, like the ones I tagged as Celebrity.

If you don’t have an existing tagged list, you can click New Search just under the Recipients bar. This will bring up a dialogue box wherein you can search by many characteristics.
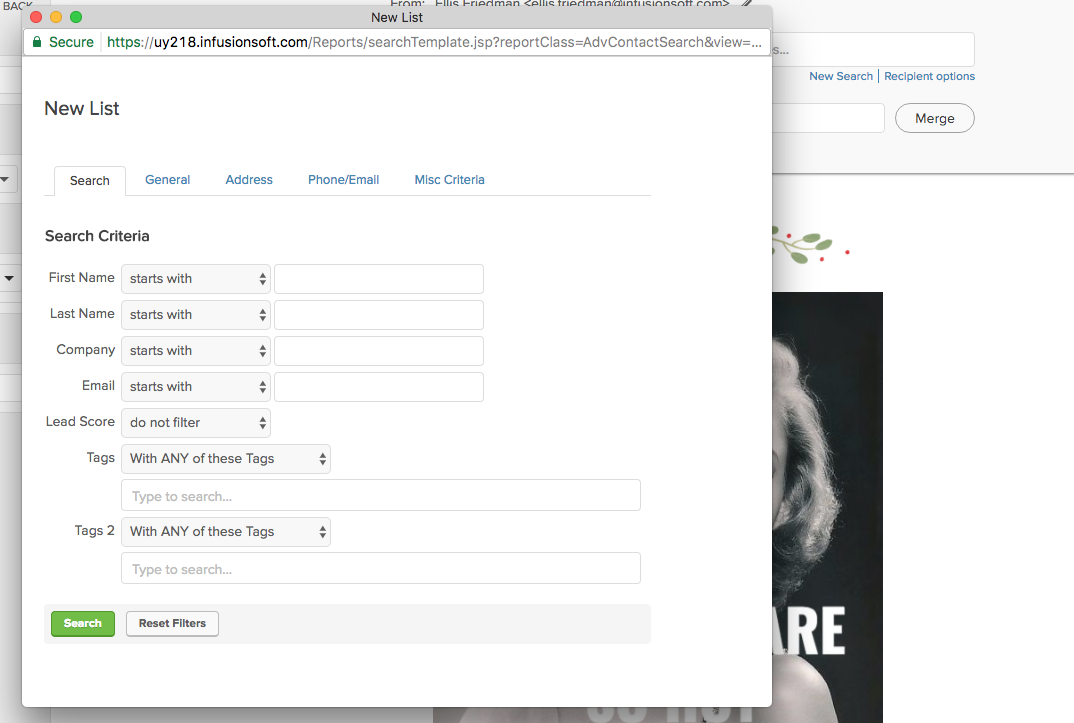
Once you hit search, Infusionsoft will find all the candidates that meet your criteria, then automatically make a new list and add it to the Recipients line.

Finally, enter your subject line! Don’t forget, you can merge in first names here, too!

We’re ready to send. Click the blue Schedule or Send button at the top and you’ll get the Email Broadcast Checklist.
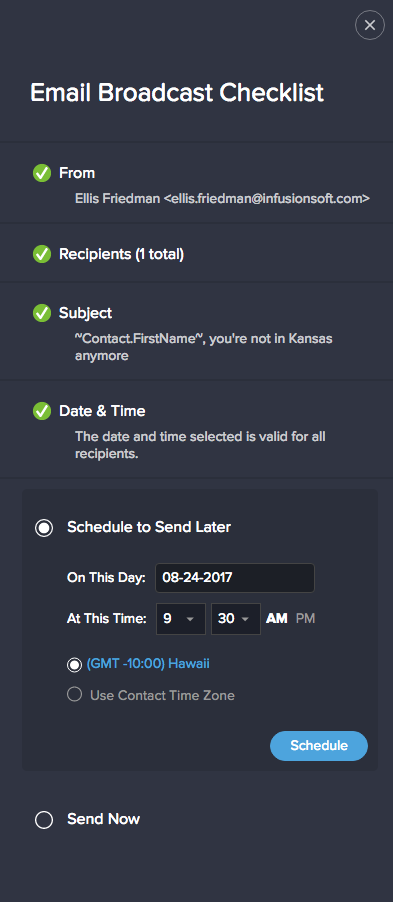
Now you can schedule out when you want to send the email, or just send it right now. The scheduler is formatted in MM-DD-YYYY, and you can choose to send it out in your time zone or in the contact time zone. For this, I’m going to choose Send Now and hit Send, and I’ll see this:
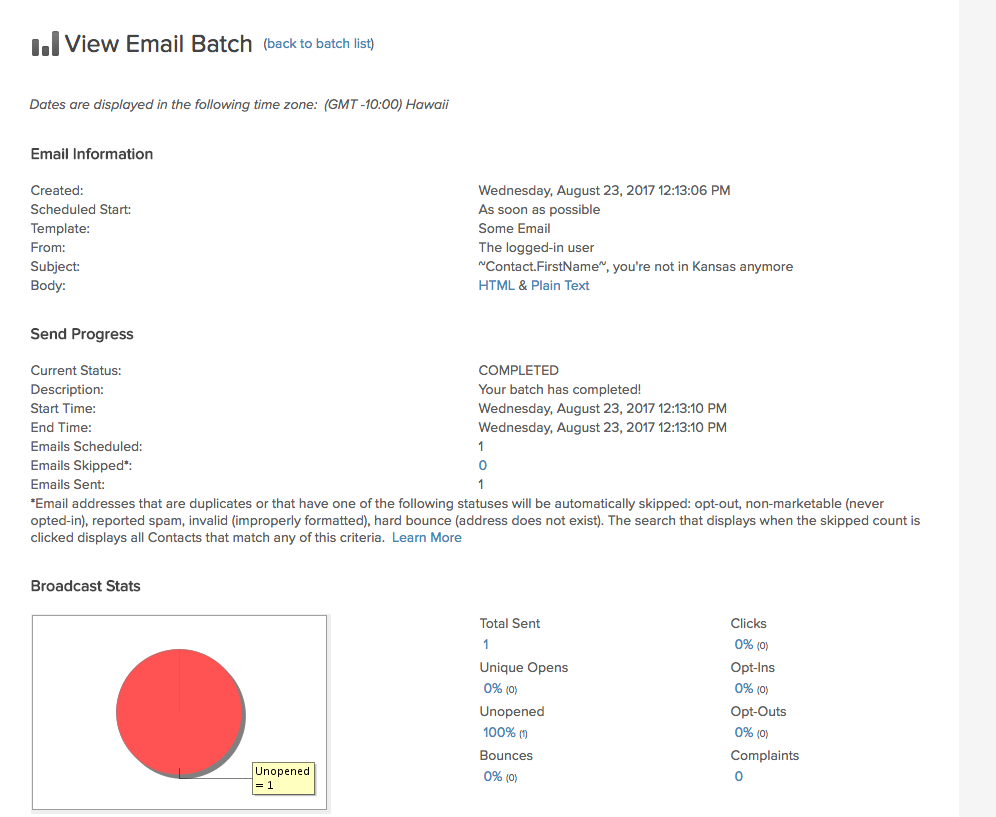
This report lets you see which specific contacts have clicked, opened, not opened, or bounced, all of which will help you determine how people are interacting with your emails. That means you can determine what types of content or links perform well, and what’s not working, so you can constantly tailor your emails to be more engaging and meaningful.
And look what popped up in my email:
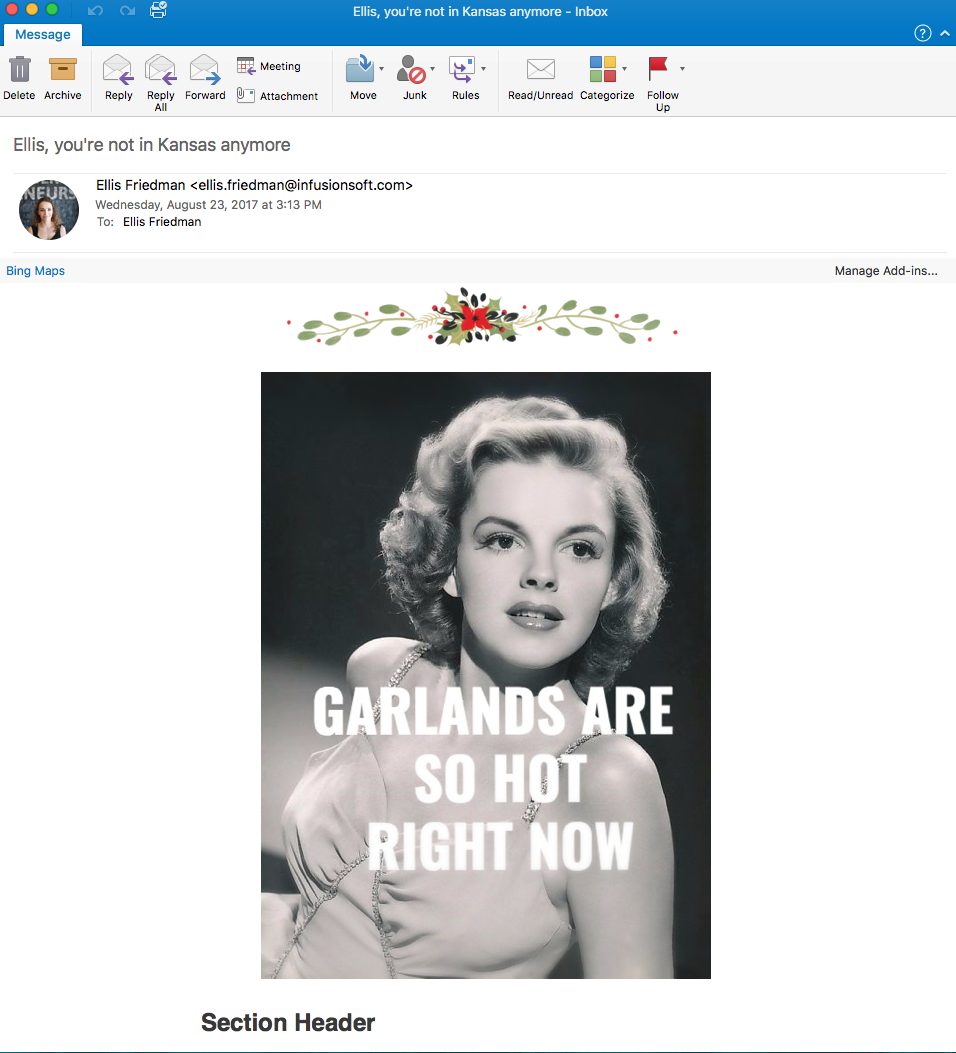
It worked! I’m melting, melting with joy!
Email blasts like this have specific strategic value for your business; they can help re-engage inactive subscribers, stay top of mind, and more! Just make sure to determine what your purpose is, the best content for it, and the right timing for contacting your subscribers, and you’re well on your way to using automated emails to grow your business.