You likely use a number of different tools like invoicing software, email, and spreadsheets to keep your business running smoothly. With that, you likely find yourself bouncing between those tools and repeating tasks. While it's great to have tools, running your small business could be even more streamlined with an automation tool like Keap where you can organize all of your information in a single location. Coupled with an app automation tool like Zapier, you can get the information in those separate apps to work together, and automatically pass information between them.
Why use automation tools? What's in it for you? Time saved and more business closed since you won't be spending time manually transferring data between all the tools you use to get work done.
With so many possibilities, it's tough to know where to start. Need some inspiration? This tutorial will walk you through how to segment leads from a form and automatically tag them in Keap. That way, your sales team has a prioritized set of leads and can stick to what they do best—closing.
Getting Started with Keap and Zapier
To start segmenting with Keap and Zapier, you'll need:
* A Keap account
* A Zapier account **
* A form tool where you're collecting leads. We'll use Google Forms in this example, but there are dozens of form tools out there that will get the job done, too.
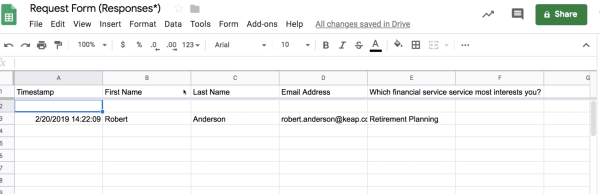
Here is a sign up form in Google Forms. Let's say we're collecting RSVPs for an upcoming event. We'll request a few data points from potential customers, like their name, email address, and the service they're most interested in learning more about. Heads up that it’s easiest if your form asks for the first and last name separately. Make sure at least one person has filled out this form, even if it's just you testing the form.

When someone signs up, their responses are stored in a Google Sheet, like this.
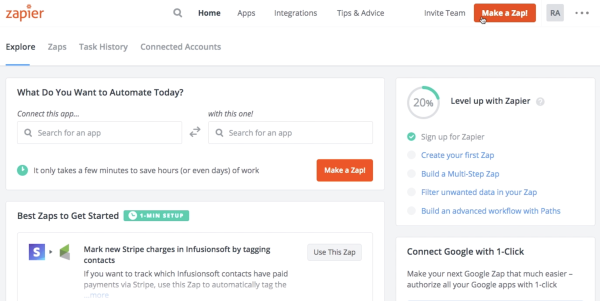
These responses are your newest leads! But asking your sales team to keep an eye on a spreadsheet isn't very efficient. Instead, we'll use automation to add these leads to Keap and tag them appropriately. Next, log into Zapier (New to Keap and Zapier? Unlock a free 90-day trial of Zapier by heading to the Zapier tab in the Keap navigation menu), and now make a new “Zap”, Zapier's lingo for automation.
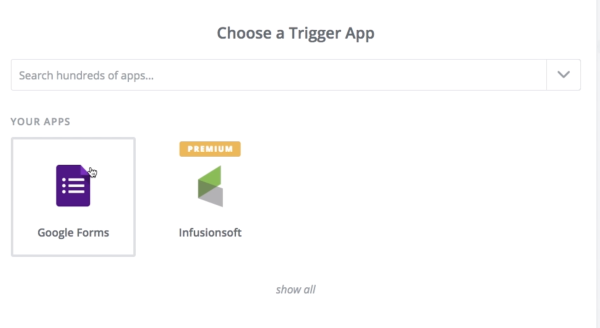
Choose Google Forms as the trigger, because new responses in the form will trigger the automation to run.
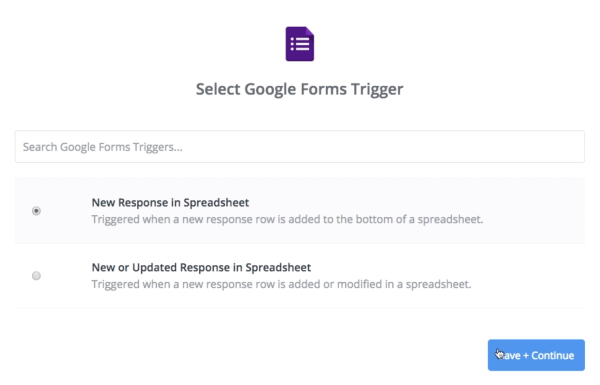
Choose “New response in Spreadsheet”. You’ll likely need to take a moment to connect your Google Account if you haven’t done so before.
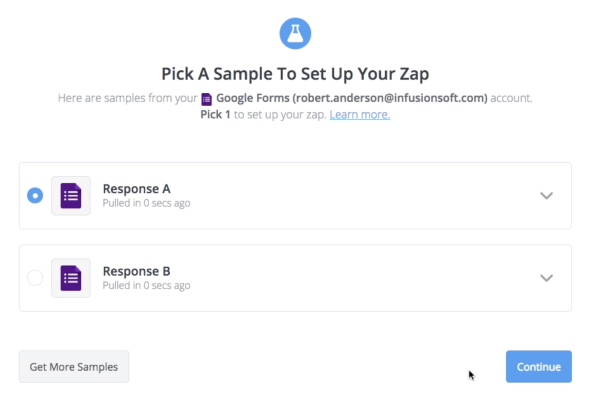
Choose which spreadsheet and worksheet you want to connect. It will pull in a sample response. Once you see the sample, click continue.
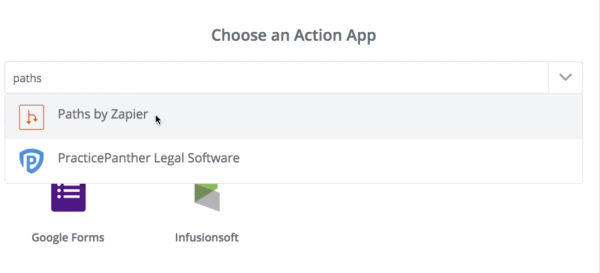
Now add an action, which is what you want Zapier to do when it detects a new form response, and search for “Paths by Zapier”.
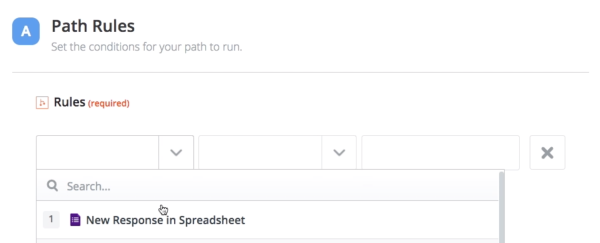
Create a Path in Zapier allows you to create conditional workflows, meaning that the info you collect in a form will take different routes based on simple rules you set. Think of Paths as if/then logic: if “A” happens in your form, then do this, but if “B” happens, do something else—and so on. This will let you segment your leads, which means you’ll be able to keep leads seperated into groups based on how they filled out the form, so that you can market or follow up differently with contacts depending on how they were segmented
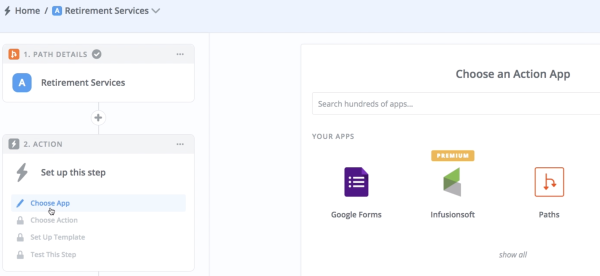
Choose Path A and give it a name.
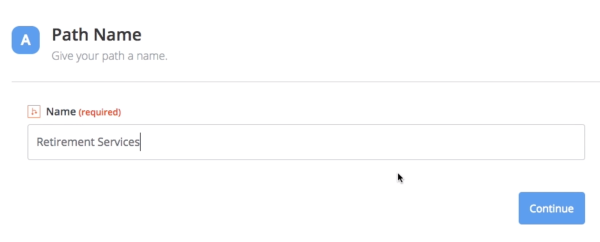
In this example, we’ve set this path to look for leads interested in Retirement Services, by choosing the field to search, and what response in that field to search for.
Then set up the action Zapier should take when someone fills out the form in a certain way, such as Retirement Services. In this case, we want to add the lead to Keap and add a tag to that lead with the matching service. On the left sidebar, Click Choose App, and search for Keap.
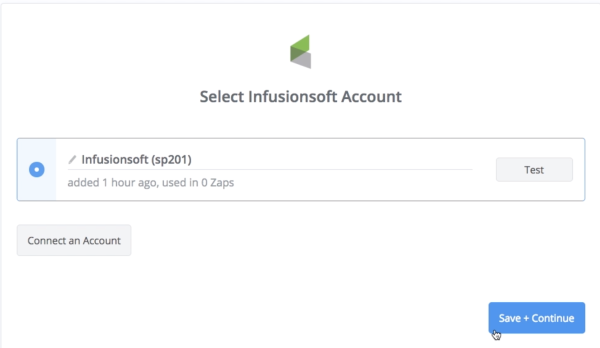
This time let’s choose Create Contact, then Save and Continue. If you haven’t connected Keap to Zapier before, you’ll have to do so here, then choose your account and click Save & Continue.
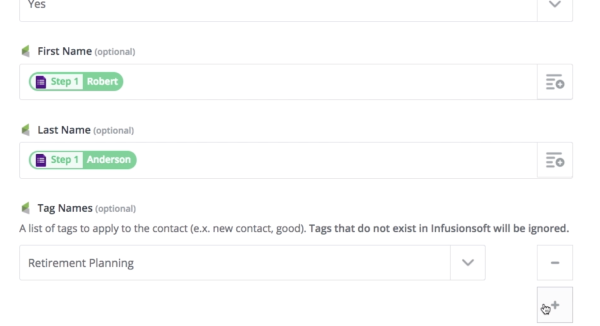
Click the drop down in the email field, and select the field that has their email, (Set up Keap Contact)and set Keap to check for duplicates by comparing their email address to any email already in the system. Choose Yes under Opt-in, and choose which fields in the google form contain the first and last name.
Tags are how we’ll keep our list segmented and trigger actions in Keap. In this example, we want our leads to go into a campaign we’ve set up for anyone interested in Retirement Planning, so we’ll choose the the tag that triggers that campaign, here.
We also want them to receive our newsletter, so we’ll also add the “Interested in Ongoing Emails” tag to these leads, which add them to the newsletter. If you have any other fields to match up, do so now, and then click Continue. Here you can set up a path for any other path you want to create. You’ll need two paths to make it work. For example, if you’re selecting service from a dropdown, Path A would be watching for Financial Services, adding a tag, and subscribing them to the newsletter.
Path B could watch for "Goal Setting" (for example) which sends that lead down a separate workflow - creating the lead in Keap, adding a tag, and automatically emailing them an ebook on setting retirement goals.
This can be repeated for however many services you offer. Each lead can be sent down a custom path, depending on the service they choose in the form, all through automation.
Now we can make sure everything was pulled in correctly, and send a test to Keap. We’ll go check that test in a moment. From here, you can set up another path for any other segment you want to create.
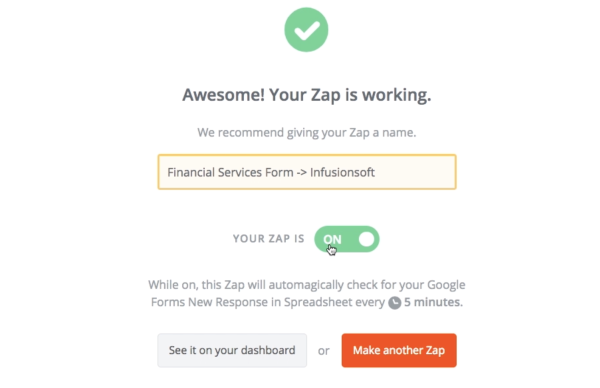
Once you are finished, name your Zap, and turn it On.
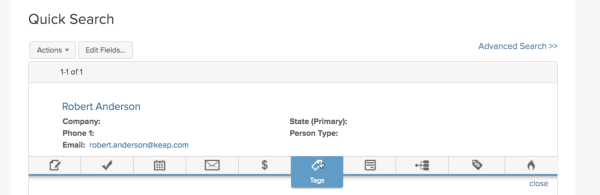
Now, back in Keap, if you search for the name of the contact, you can see that it was imported from the Google Form into Keap. If you click on Tags you’ll see that they have been applied.
Now you can create a saved search that will show you a list of everyone who filled out the form in this way, and any tags that trigger follow up emails, tasks or any other automation will have already started taking effect.
This integration frees you up from constantly watching your pipelines for opportunities as Zapier is working behind the scenes with Keap identifying the most valuable leads for you. And budget is not the only criteria for defining high value. You can choose a specific industry most valuable to you or they can choose from a particular service which brings you more revenue.
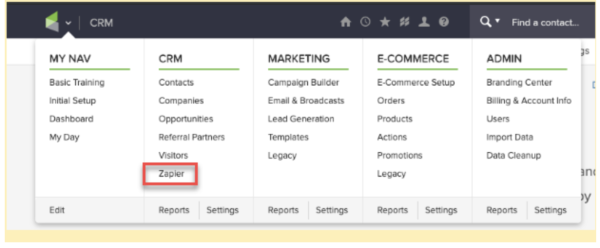
Segmentation is a crucial step in turning leads into clients and providing those clients with more personalized service, but it’s not a process you want to handle manually. Through a Keap/Zapier integration, you can gain the benefits of segmenting without repetitive tasks. Starting April 29th, Keap customers are eligible for 90 days of Zapier access for FREE. Customers that accept the Zapier offer will also receive an additional 30 minute coaching session outside of their normal Kickstart with an onboarding coach to help set up their first Zap. Interested? Go to CRM in your nav bar and look for Zapier.