by Ellis Friedman Fitch
Here’s a scenario that should scare you: A robot takeover—of your email list.
That’s right: If you don’t protect your web forms, you could end up with lots of spambots filling out your forms, filling your list with fake contacts or people who didn’t opt in to your email list. This can impact your email deliverability and Infusionsoft’s deliverability. Luckily, Infusionsoft makes it easy to take the right precautions to make sure bots don’t abuse your web forms, by enabling Google reCAPTCHA on all our web forms and landing pages.
We’re excited to announce that our landing page and web form capabilities have been updated with Google’s Invisible reCAPTCHA. Want to know more about Invisible reCAPTCHA and why you should use it? Check out our post about it on the Knowledge Center. In a nutshell, your visitors shouldn’t see any more boxes asking them to confirm they’re human; instead, the box will come up only if Google suspects they may be a spambot.
All web forms and landing pages you create going forward will automatically have Invisible reCAPTCHA, but how do you ensure that previously created web forms and landing pages have this security features as well? Here are some instructions:
First, if you have previously disabled Infusionsoft’s spambot detection, we strongly recommend that you enable it. In other words, we recommend that you uncheck the Spambot Detection box if you have it checked. Unchecking the box enables Invisible reCAPTCHA.
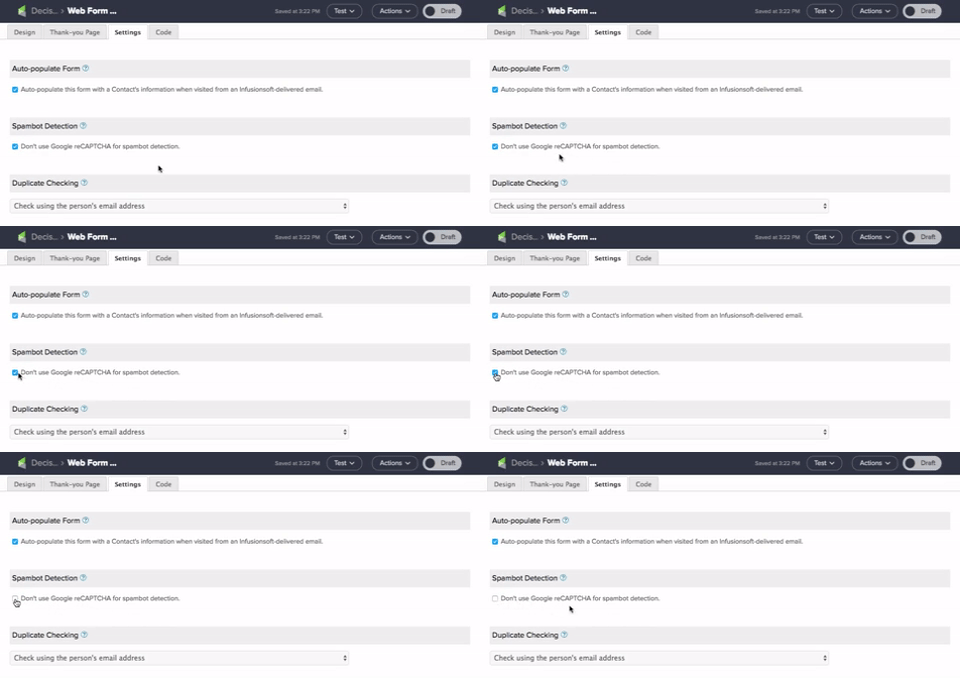
Here’s how to enable spambot detection, or double-check that you have it enabled: Head into any Campaign Builder campaign that uses a web form or landing page and double click. Then click into the Settings tab.
Note that if you want reCAPTCHA enabled, you must leave the box unchecked. Checking the box means that you won’t have reCAPTCHA. We strongly recommend making sure the box is unchecked, so that you do have reCAPTCHA.
How to update existing landing pages and webforms with Invisible reCAPTCHA
Which instructions you follow below will depend on whether your site forms and landing pages use HTML, Javascript snippets, or hosted forms and landing page.
If you use hosted web forms or landing pages, you don’t need to do anything. Your forms and landing pages will automatically be updated with Invisible reCAPTCHA.
If you use HTML or Javascript, here’s what to do:
If you use HTML
Updating your landing pages and webforms just requires copying and pasting some code into any web page that references those landing pages or webforms.
First, navigate to any campaign in Campaign Builder that has the webform or landing page you want to update. You’ll have to update them all, so keep track of which ones you’ve updated.
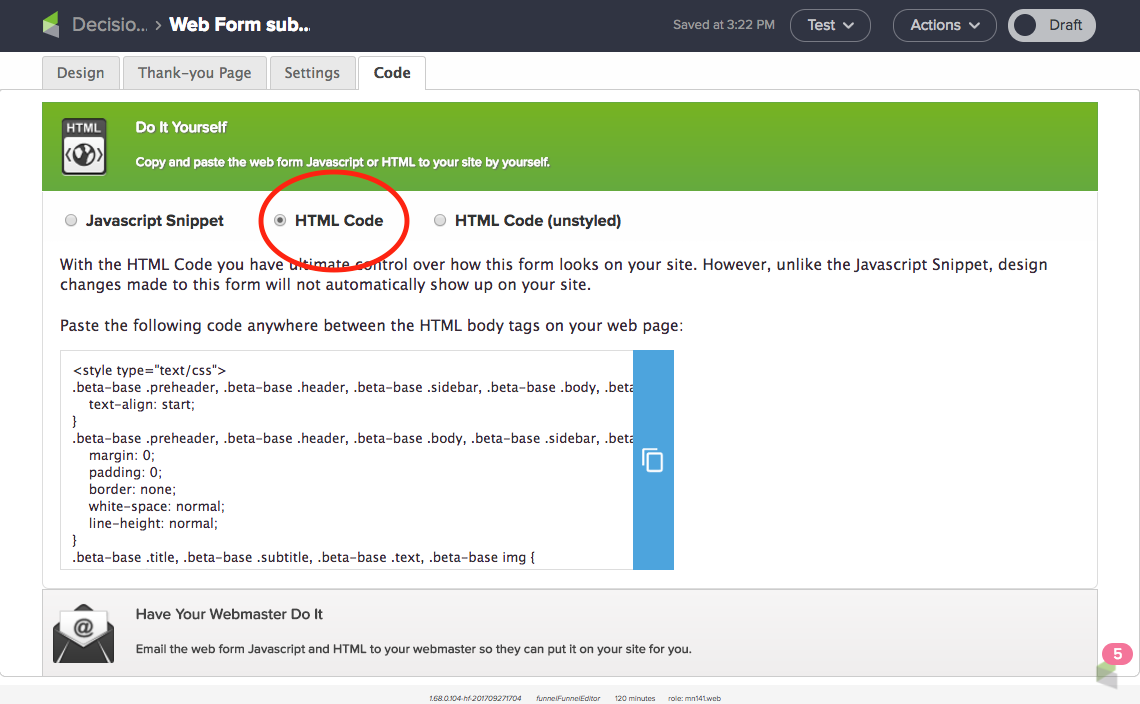
Double click on the webform or landing page goal, and click on the Code tab. By default, the Code tab will bring up the Javascript Snippet. That’s not what you want. Select the HTML Code radio button just to the right of it.
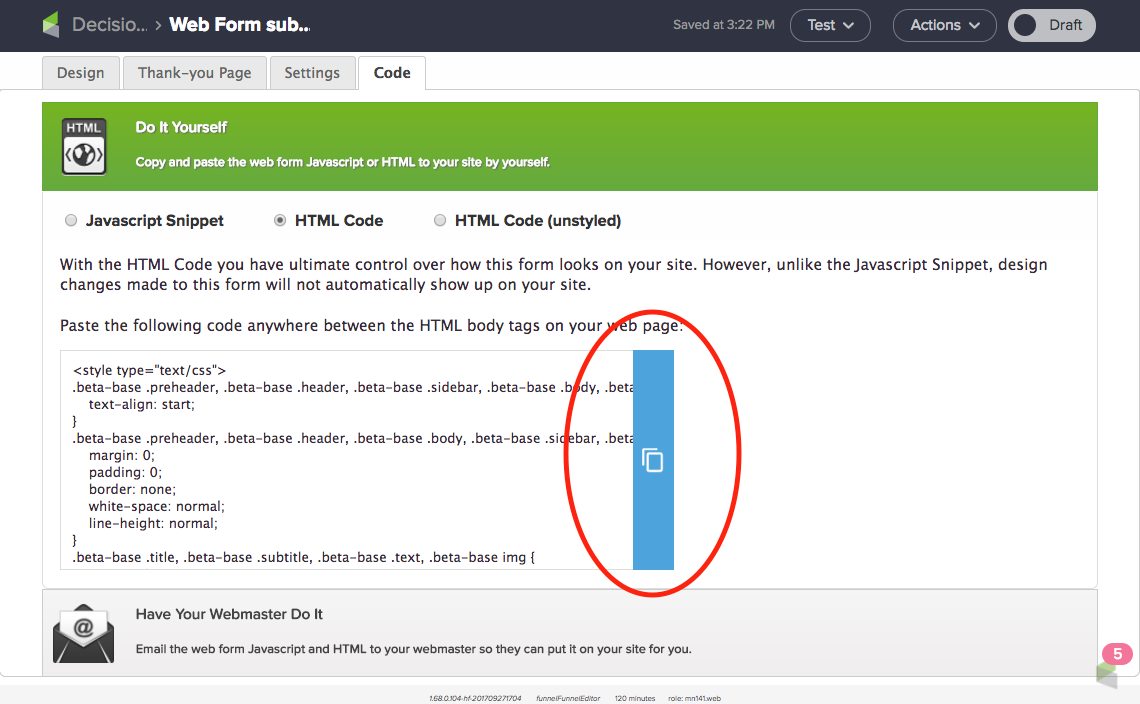
Click the blue copy icon to the right of the code box to copy the HTML code.
Now go to your website to where the original web form or landing page HTML code is. You’re looking for the same place you pasted code in before for your landing page or webform. This will be different for every hosting site.
Once you get to where the code is, paste in the new HTML code and enjoy your new Invisible reCAPTCHA.
If you use Javascript
If you use the Javascript snippet on your external pages, you don’t have to do anything. However, form submissions that use the Javascript snippet will get redirected to a second, Infusionsoft-hosted page, where users will have to check the box confirming they are not a robot if Google detects suspicious activity.
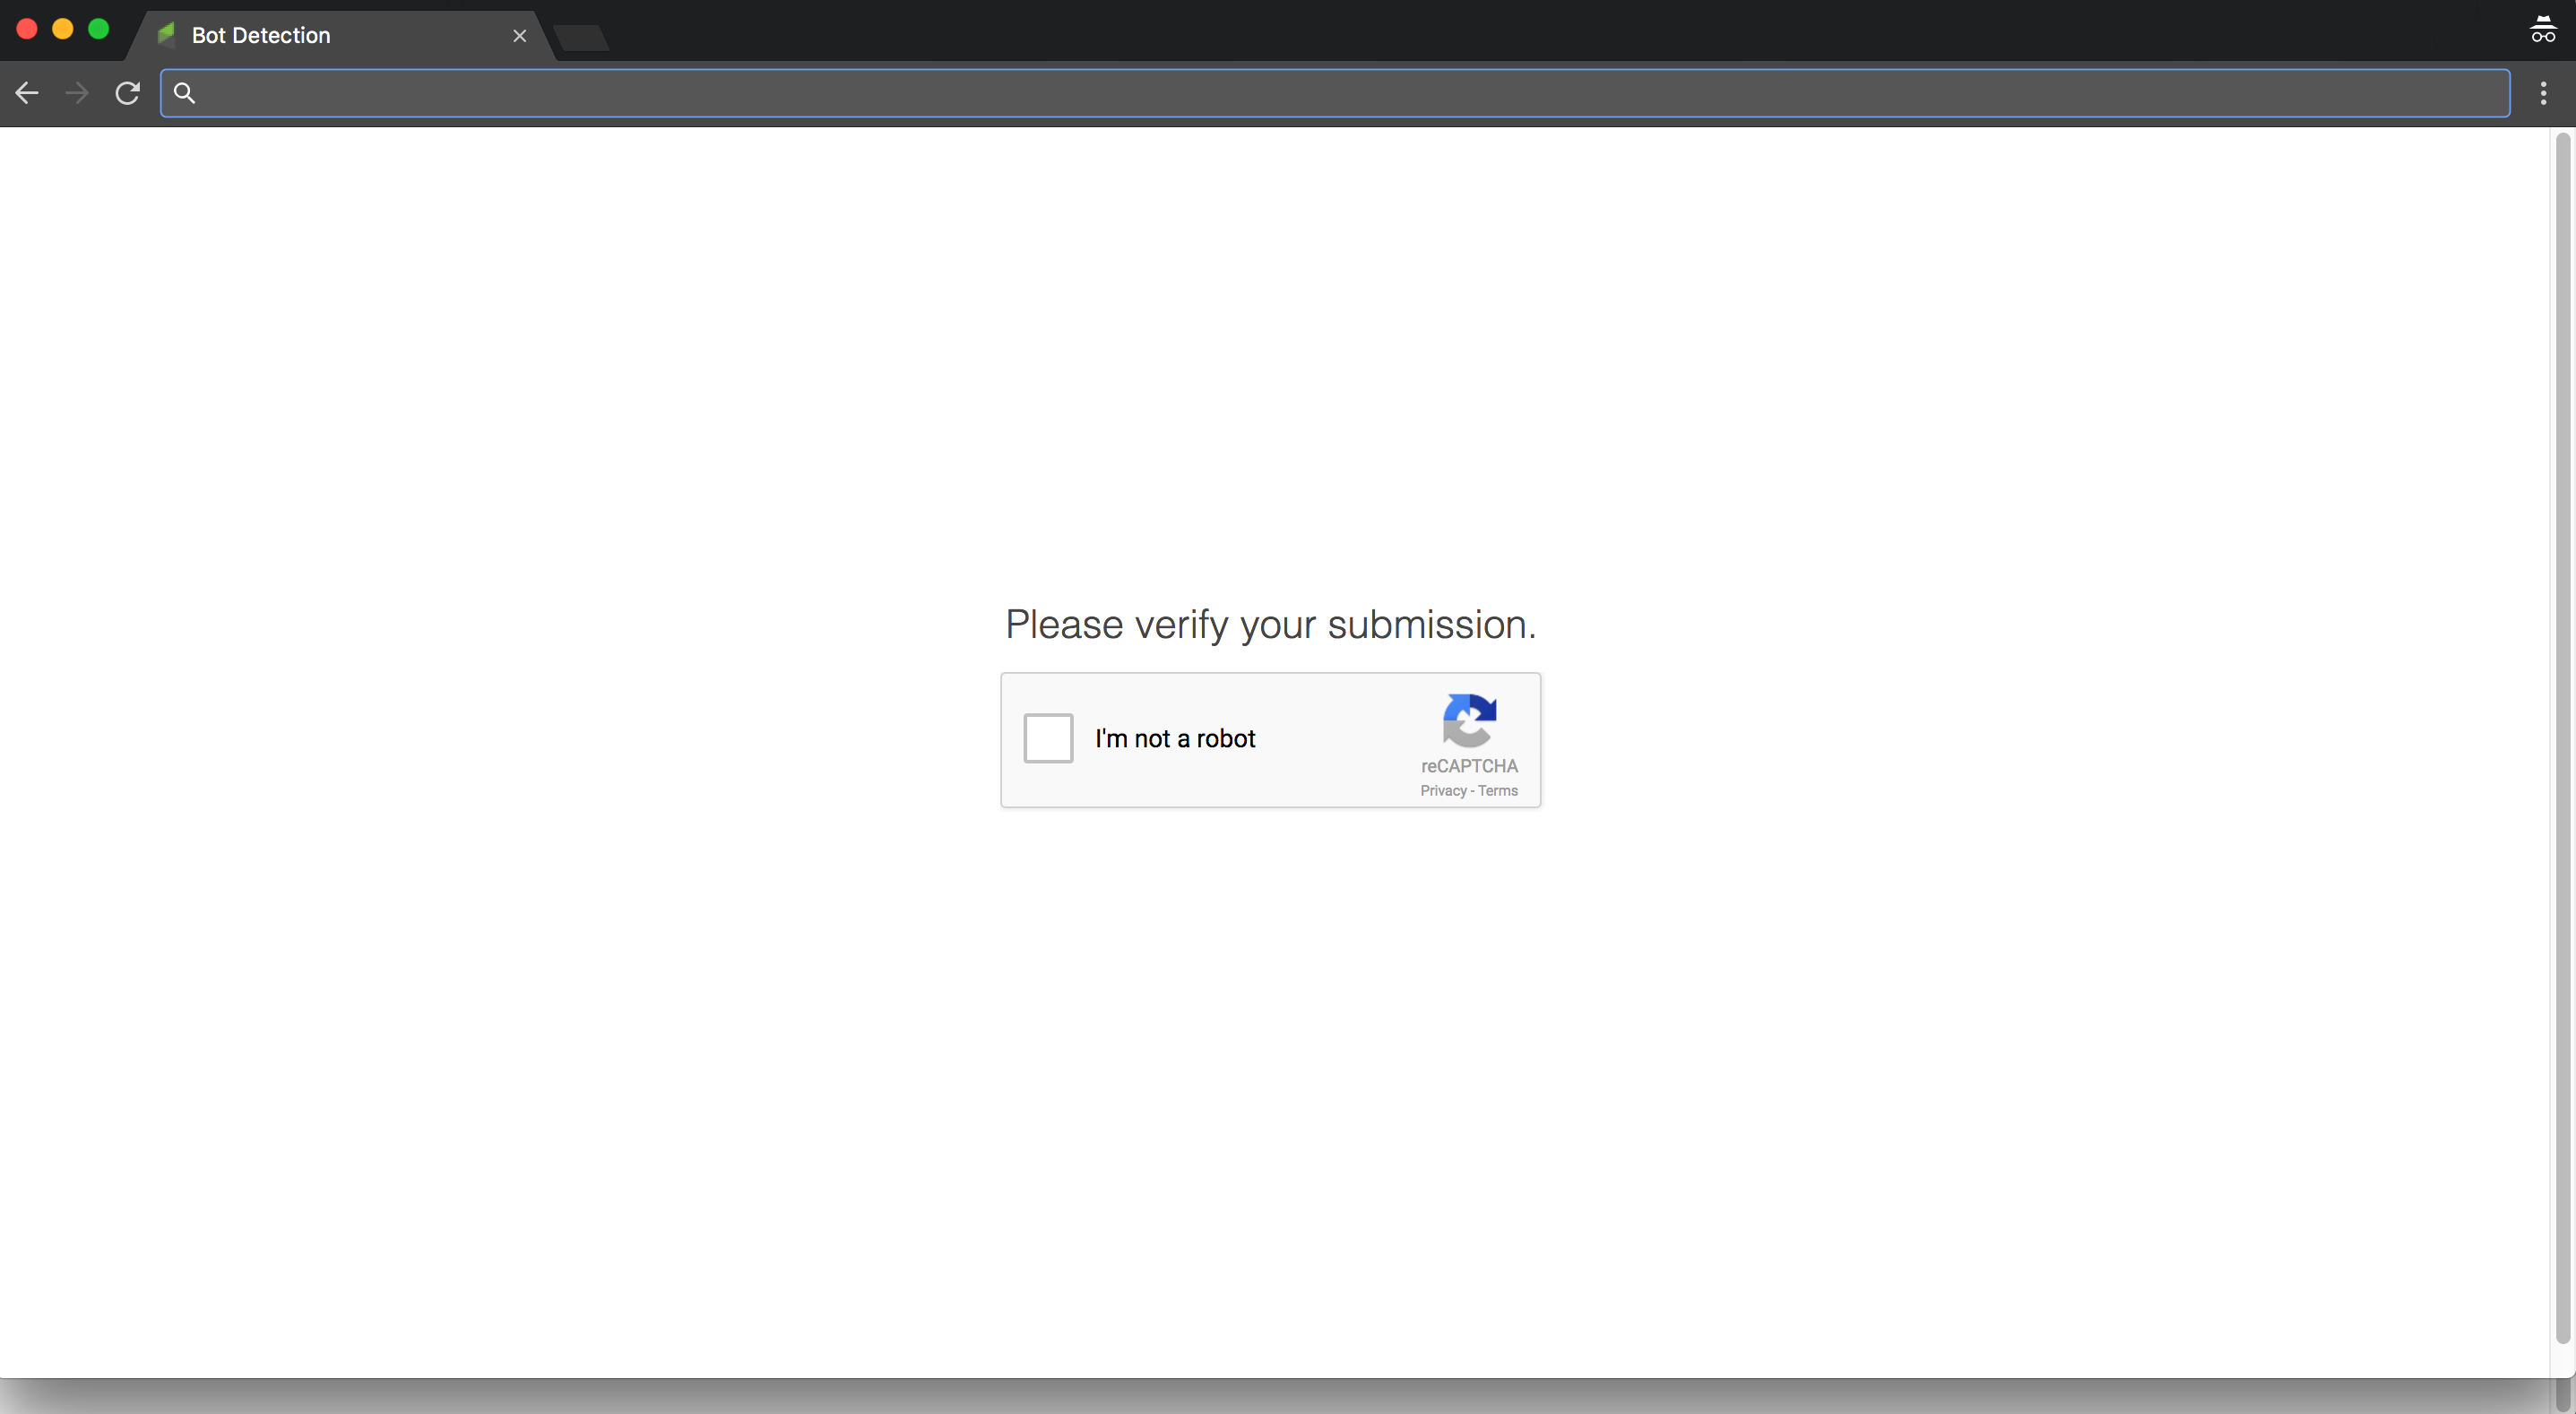
Users will then be redirected back to the Thank You page that already exists for that form or landing page.
If you don’t want the intermediary checkbox page, you’ll need to replace the Javascript snippet on your site with the new HTML code. In which case, you’ll want to follow the directions above.
Removing outdated CAPTCHA boxes
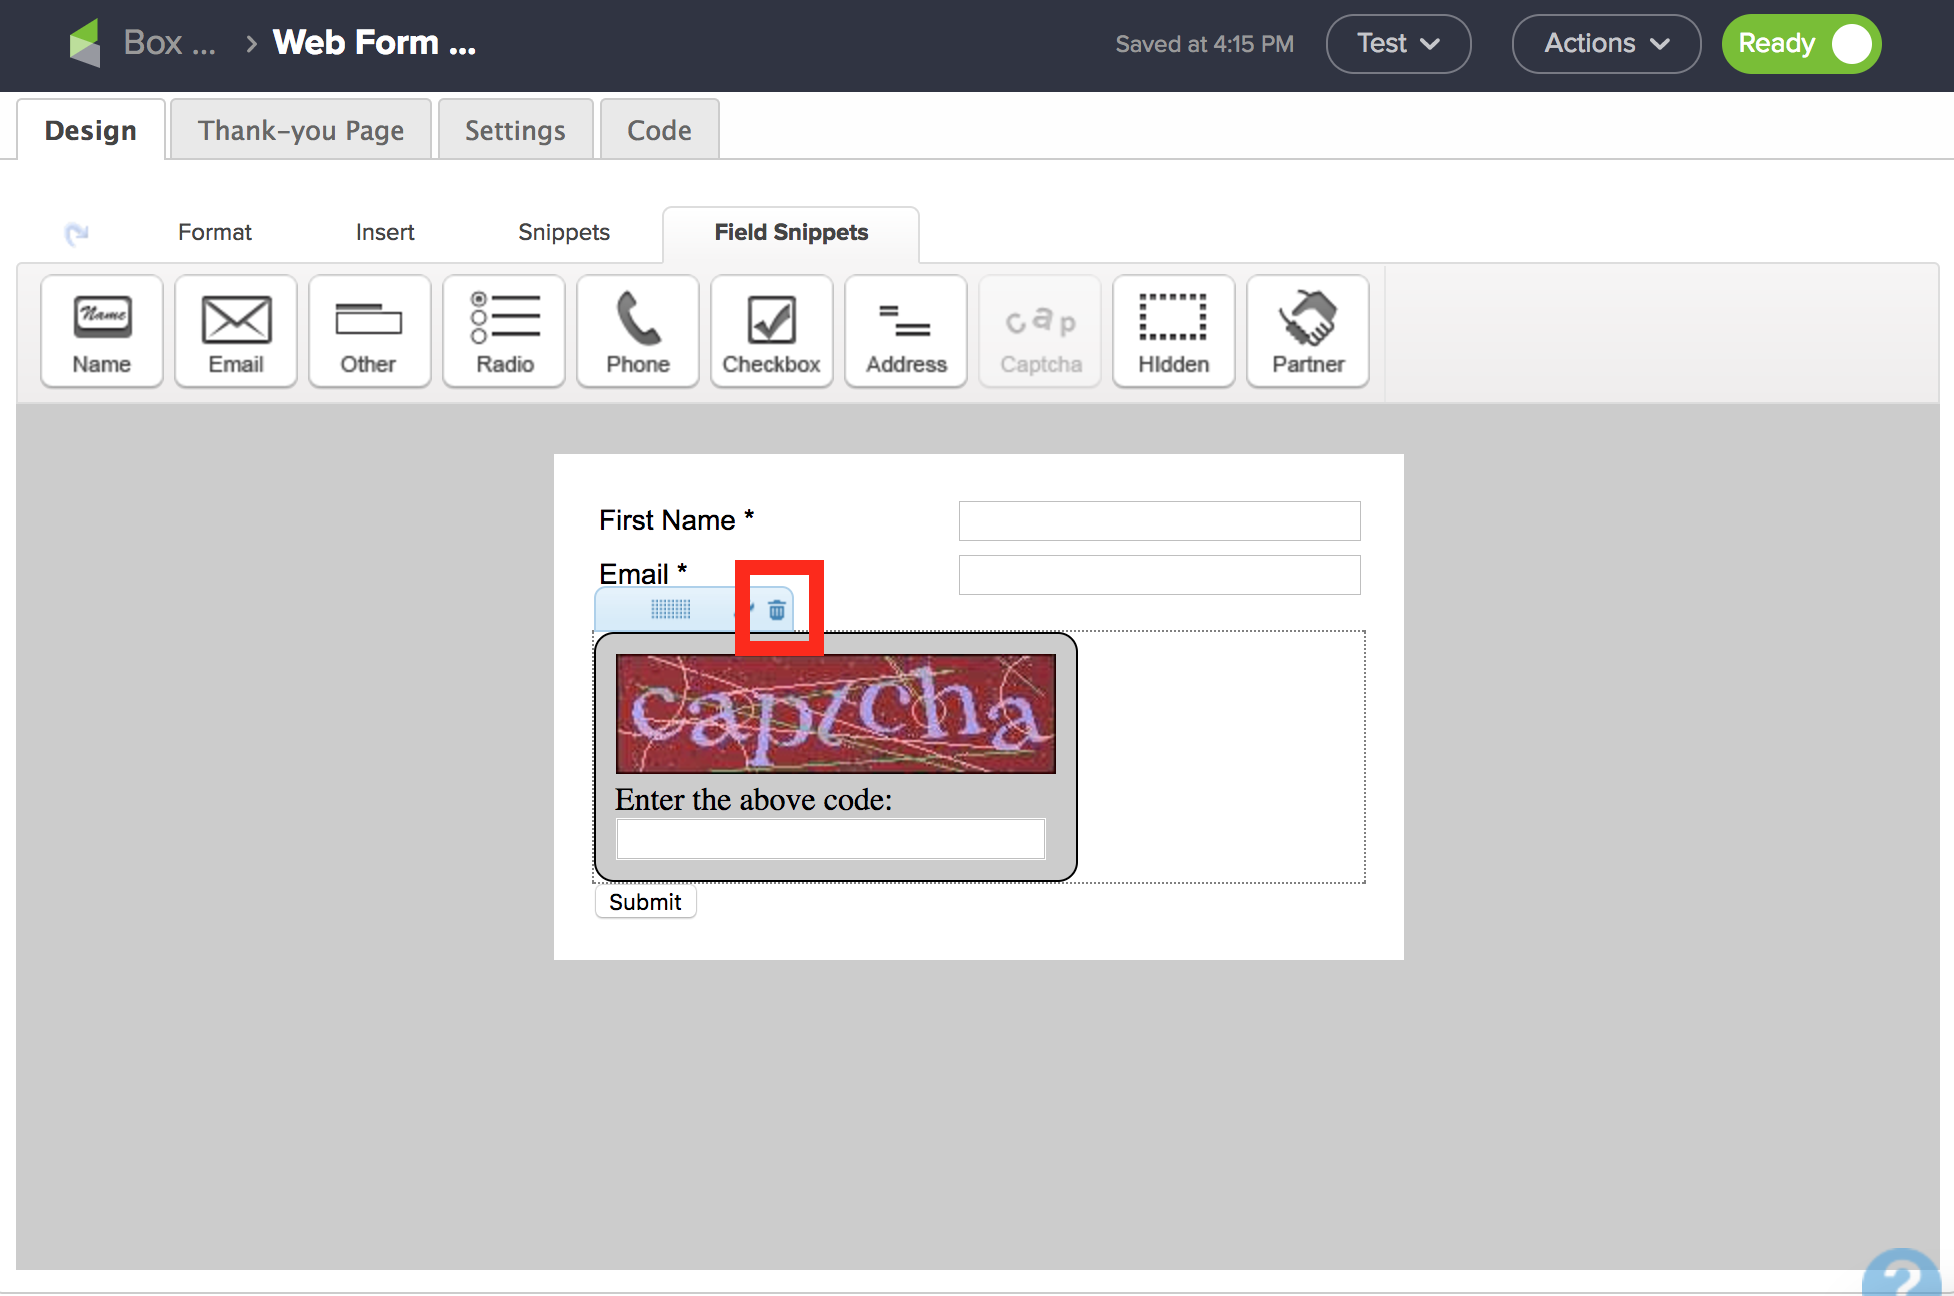
If you still have landing pages or webforms that include the older version of CAPTCHA, you’ll need to remove those boxes.
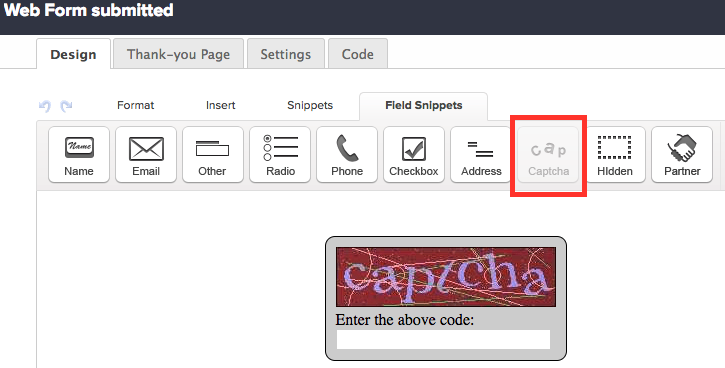
Head into the campaign with the form or landing page that you want to update, double click the landing page or webform goal, and navigate to the design tab. Then simply hover over the field snippet and click on the trash can.
And that’s how to make sure your previously published landing pages and webforms have Google’s new Invisible reCAPTCHA.
If you use HTTP
If you don’t use HTTP, relax—you’re done! However, if you’re a technical star who uses HTTP post functionality with Campaign Builder, we’re still gathering information and doing more research to learn what the best way is to support your use of the tool. We always recommend use of the API to make sure that you can push information to and from Infusionsoft. At this point, you don’t need to do anything, but we strongly recommend that you work with our API to make sure everything runs smoothly.
If you have questions about how this might impact your business, please submit your information here and we will help you determine the best course of action.
There are lots of reasons to use reCAPTCHA, but it comes down to what we said above: better email delivery. If you want to learn why email deliverability is so important to your business, and how to make it happen, check out our email deliverability guide.
We strongly recommend that everyone use Invisible reCAPTCHA to prevent spambot form fill. While your wrist might get a little tired with copy-and-pasting to update your pages, you’ll be enjoying the rewards of humans-only email lists for years to come.

