
Many small businesses are struggling to stay afloat because of changes within the global economy thanks to the COVID-19 crisis.
The pandemic has transformed how people shop. According to data from Adobe’s Digital Economy Index, ecommerce sales in the U.S. increased 49% in April, with grocery sales rising 110%. Electronic sales increased 459%, as would-be podcasters and other creatives set up home studios. Even the buy-online-pickup-in-store option increased from February to March in 2020, going up 62% over last year’s numbers.
If you’ve been thinking of adding online ordering to your small business website, now’s the time. By adding an order form to your site, you can turn your small business into an online store and generate new revenue.
Setting up an order form on your website used to be complicated, but with a couple of WordPress plug-ins and a payment gateway, you’ll be ready to go right away.
How to create an order form for your website
There are two ways you can create your order form: the first way lets you accept online payments for orders, while the second way is without online payments. You might wonder why you’d bother setting up a form that doesn’t accept online payments, but it’s not necessary for some small businesses.
If your customers pay by check, money orders, or direct deposit from their bank account, you don’t need to attach a payment gateway to your order form. Or maybe your business prefers to send official invoices to customers requesting payment. Either way, we’ve got you covered.
There are multiple ways to create an order form with WordPress.
The easiest way is to add a simple order form with WPForms, which lets you easily create and add order forms to your site.
Another plug-in that’s handy is Formidable Forms, which you can use for more complicated price calculations. For example, you can assign prices to different options in your purchase form, then calculate the total price. This could be useful if you have a service-based business like a landscaping company where the price of the service is based on the size of a yard.
For this tutorial, I’ll use WPForms to create a simple order form.
Pre-work: install a form plug-in
First, you’ll need to download and install the WPForms plug-in. Upgrade your plan to the Pro level to get access to the Form Templates pack, which has the order form template we’ll use for this tutorial.
Now you’re ready to create your online order form that accepts online payments. There are four steps (five if you are accepting payments directly on the form):
- Creating your form
- Configuring email notifications for orders
- Setting up the confirmation message for all orders
- Configuring payment settings (optional)
- Adding the form to your website
Creating an order form that accepts online payments
Once you’ve installed WPForms, you’re ready to create your form and connect it to your payment gateway.
Step 1: Creating your order form
- Inside your WordPress admin dashboard, click WPForms > Add New.
- On the form creator setup screen, name your form and select the Billing/Order Form template.
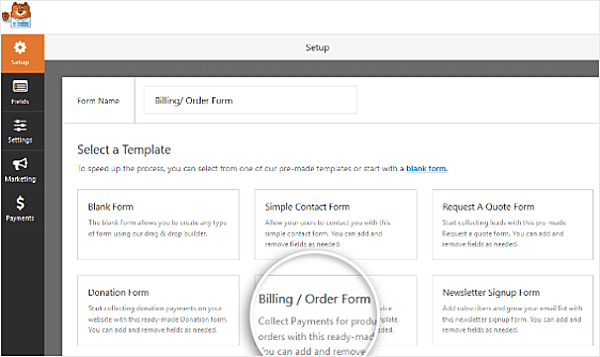
- Scroll to the Available Items section to add the products people can order through the form.
- Add each product name, choose a price, and optionally add an image for each one (select the Use image choices checkbox to add images; leave it blank if you don’t want any images.)
- Add all the other fields you need for your online orders, such as name and address, phone number, or email address.
- Click Save.
Now you’re set for the next step, which is setting up the confirmation emails you’ll receive with each order.
Step 2: Configuring notifications for orders
WPForms will automatically send an email about any orders to your default email address, which it does for any kind of form you add to your site with it. You can also set it up to send emails to multiple addresses for your small business and customers to confirm their orders.
Each email must be configured separately but is easy to do in WPForms.
- In the Form Builder, click Settings > Notifications.
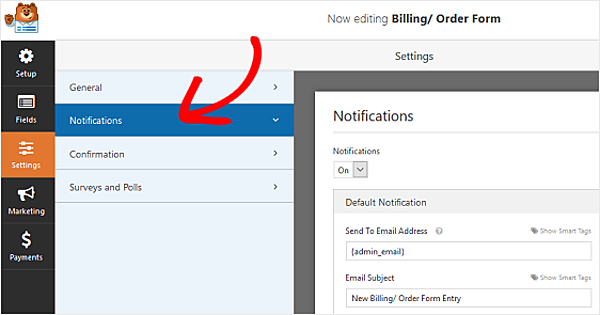
- To receive emails about each order, leave all the information on the Notifications screen as-is. Your business email will receive each one.
- To send your customers a confirmation email about their orders, click Add New Notification.
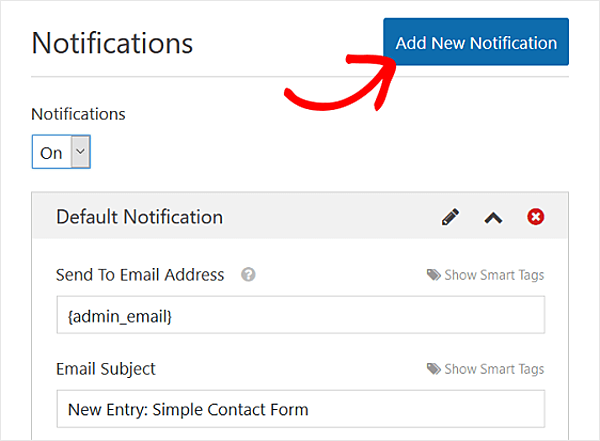
- Enter a name for the notification, such as “Customer email notification” and click OK. This name is only for your reference and isn’t seen by any customers.
- Click Show Smart Tags and select Email, so the plug-in knows to send this notification to the email address that’s entered on the form.
- Next, configure the following form fields:
* Email Subject: Type something relevant to the order.* From Name: This is your business name.* From Email: Your business email address.* Reply-to: Your business email address or the one you want to receive any order email replies to.
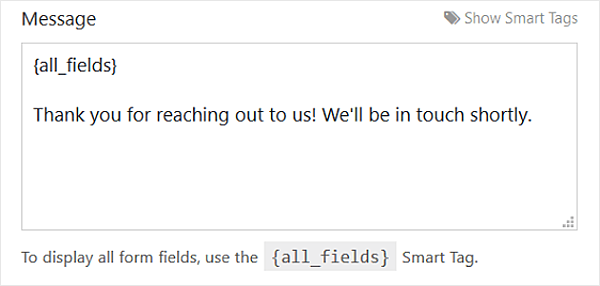
- In the Message field, decide what information you want to send back to customers. For example, to send everything, use the {all_fields} smart tag. To send specific information, click Show Smart Tags for the Message field and choose the information to include.
- You can also enter a personalized message in the email by typing directly into the Message field.
- Click Save.
Your email notifications are all set up, so it’s time to add a form confirmation, which is different from an order confirmation. This is the message or page that’s displayed to people after submitting the order form on your website. You can display a message on the order page or send them to a different page of your site.
Step 3: Setting up the confirmation message
Form confirmation messages are displayed to customers once they submit your order form. You have three options:
- Message: A simple confirmation message is displayed on the page, letting customers know their form was processed. This is the default setting for WPForms.
- Show Page: This will send customers to a specific page on your website submitting their order, such as a Thank You or Order Confirmation page.
- Go to URL (Redirect): This option sends people to a different website after submitting their order. I do not recommend using this option.
To set up a confirmation message or Thank You page:
- In the Form Builder, click Settings > Confirmation.
- In the Confirmation Type drop-down, choose either Message or Show Page.
- Customize the confirmation message or enter the Thank You page URL (be sure to set up this page on your website before entering it here.)
- Click Save.
If you’re accepting payments through your online form, continue reading. Otherwise, skip to "Creating an order without online payments."
Step 4: Configuring the payment settings
Now it’s time to connect your payment gateway to your order form so you can collect payments for your orders online. WPForms integrates with PayPal and Stripe, so choose the one you’d like to use before continuing.
- Download and install the appropriate WPForms payment add-on (either PayPal or Stripe.)
- In the Form Builder, click Payments and then PayPal Standard or Stripe.
For PayPal: Add your PayPal email address, select Production mode, choose Products and Services, and adjust other settings as needed.
For Stripe: You’ll need to connect the service to WPForms to your website, configure the main settings for it, then authorize the connection.
All that’s left is to add your order form to your website.
Step 5: Embed the order form on your website
To add your order form to a page on your WordPress site:
- Create a new page.
- Click the plus sign to add a new block.
- Click the Add WPForms icon.
![]()
The WPForms widget appears.
- Choose your order form from the drop-down menu.
- Click Publish. Your order form is now live on your website!
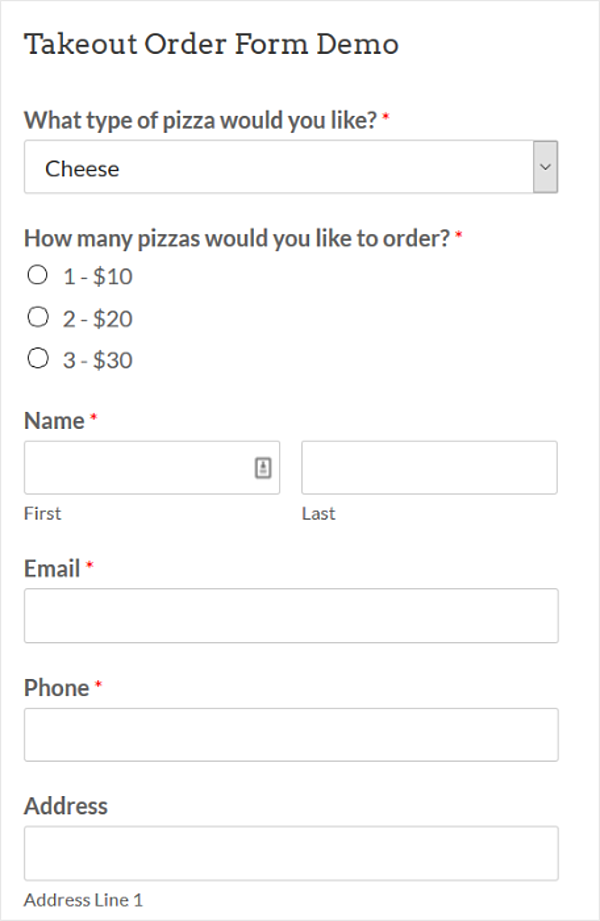
Here’s a preview of what your online order form could look like:
If you want to create an order form that doesn’t connect to your payment gateway, keep reading.
Creating an order form without online payments
The process to create an order form that lets you handle payments separately is much like the one where you accept payments:
- Create your form.
- Configure email notifications for orders.
- Set up the confirmation message for all orders.
- Add the form to your website (Called Step 5 earlier.)
You’ll follow the same steps as explained previously, but you’ll skip the Configuring the Payment Settings step since that doesn’t apply to you.
We recommend sending order notifications to three email addresses to improve your order form's user experience: your default website address, your customers, and an order-specific email address for your business. This way, you ensure all emails are monitored and followed-up on regularly since your default email address might be checked infrequently.
You’re all set! You’ve just learned how to add an order form to your small business website.
Final thought
By adding your order form directly to your site, you’ll capture all orders right away. Plus, if you’re accepting payments through the form, you’ll save on transaction fees because you’ll only have the one from your payment processor. With other ecommerce platforms, you’ll get dinged a couple of times as everyone takes a cut of your money. No matter what’s happening in the world, you’ll want to keep as much money as you can, right?
You can use your simple order form to sell physical and digital products, or even start a subscription box service and add a new revenue stream to your business. Many small businesses and restaurants are creating meal kits, subscription boxes, or other curated packages of their products, so why don’t you? Adding online orders could be a business-saver for you.