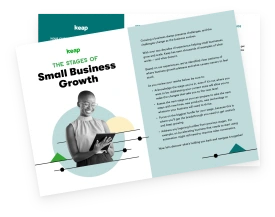
Lead magnets are proven to be highly effective, but setting one up can be intimidating. We’ll break it down for you, step by step, so you can have your lead magnet landing page and follow-up automation up and running sooner than you thought possible.
What is a lead magnet and why do you need one?
A lead magnet is a piece of free content that provides valuable information to your target audience in exchange for their contact information. It can take the form of an ebook, a checklist, a guide of beginner tips, a white paper, or whatever creative resource you can dream up. It gets its name from the fact that it’s designed to attract leads into your sales funnel.
Sharing free content in exchange for a lead’s contact information grants you permission to send them additional communications, which gives you the opportunity to continue to build a relationship with them and nurture them through your sales process.
Unfortunately, many busy small businesses—especially service-based businesses—create a lead magnet but don’t implement the follow-up needed to turn those leads into clients.
That’s why creating an automated lead magnet campaign is essential to success. It can help you improve these important metrics in your business:
- Increase number of opt-ins
- Increase lead magnet downloads
- Increase free consultations booked
- Reduce time spent following up
How an automated lead magnet campaign works
An automated lead magnet campaign is a type of business automation where you automate the entire process from lead magnet delivery to follow-up nurture so you don’t have to do it manually. Automation ensures that the process happens consistently every time, so you can rest assured that each lead is getting the right information at the right time.
Automated lead magnet campaigns are especially important for service businesses because there just isn’t enough time to follow up as much as you know you should with all the people in your pipeline.
Following up is tedious, time-consuming to keep track of, and you may often wonder if you’re bothering people. But following up repeatedly with valuable resources and compelling offers is a proven way to educate your leads and boost sales. The fortune is in the follow-up.
Here’s how to create and automate a lead magnet nurture campaign, from landing pages to follow-up emails, so you can convert more leads into clients and grow your business.
Customizing your lead magnet strategy
First, think about the experience you want your leads to have. In other words, your customer journey. Ask yourself questions like:
- What is the most urgent need they want help with?
- How much time do they have to read/use the free content?
- How can I teach them enough to make them want more?
- What do I want them to do next? Book a call? Buy an entry-level product?
- How will I keep them engaged if they don’t act right away?
With the answers to these questions, you can figure out:
- What the content of the lead magnet will be
- What content on the lead magnet landing page will entice them to download it
- What call to action you’ll focus your follow-up message on
- What your secondary call to action will be
- How many emails and text messages will be needed
- How you’ll move them into your ongoing communications
Content for your automated lead magnet campaign
Next, you’ll create your content. You’ll need:
- A lead magnet that gives new leads valuable information and positions you as an expert in your field
- A landing page for the lead magnet where you capture the lead’s contact information
- A thank you page where they can download the lead magnet
- A series of follow-up emails that nurtures your lead and encourages them to take the next step in your sales process
For service-based businesses, we recommend a follow-up sequence that encourages leads to schedule a free consultation with you. This gives you a chance to impress them during a live interaction and gather the information you need to provide a quote or sell the package that’s right for them.
If the lead doesn’t schedule an appointment, you can offer a low-priced informational product at the end of your nurture sequence as a way for them to get to know your work better before committing to an appointment.
Lead magnets: Keep it simple
A lead magnet should be valuable, not a fluff piece, but valuable doesn’t necessarily mean long. Most people are busy and need to get what they want quickly. You are also busy and need to get your lead magnet created as quickly as possible. Therefore, a lead magnet should:
- Be focused on solving only one problem…
- That the audience knows they have…
- And they’re urgently looking for a solution for…
- Which you can provide in a straightforward sharing of information (not personal interaction)...
- While also showing them how much more you can help them if they take the next step with you.
A lead magnet is not the place to thoroughly educate prospects on your topic. Stick with the basics for now, knowing that you can share more wisdom in future communications.
Lead magnet landing page and thank you page
Next, you’ll need to create two web pages:
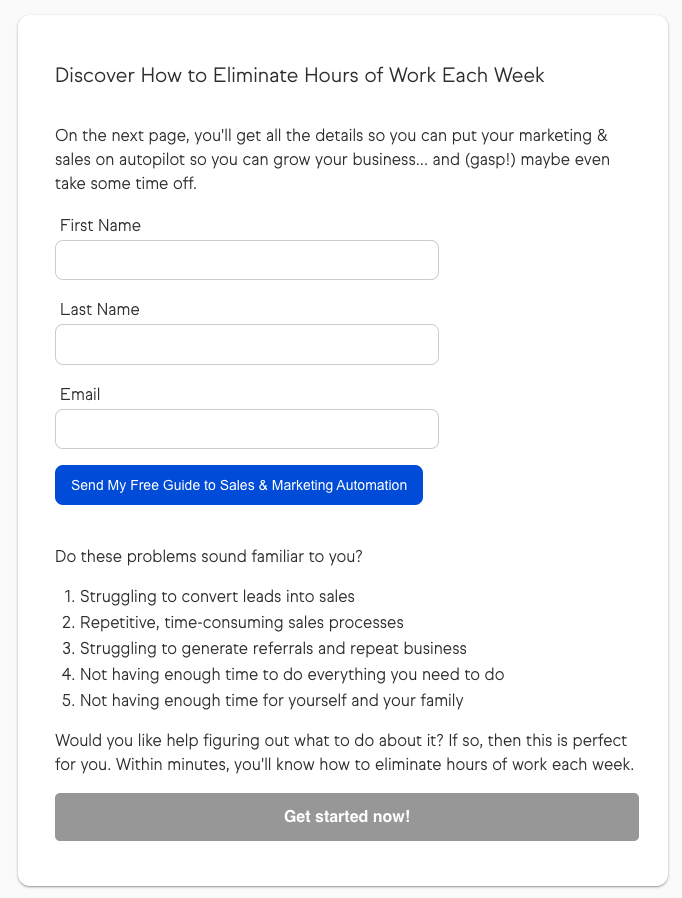
Lead magnet landing page – This is the landing page promoting the lead magnet, where you’ll collect the contact’s email address. Treat this like a sales page where the “product” you want them to “purchase” (with their contact info) is the lead magnet.
If you don’t have the time to create a fancy sales page for your lead magnet right now, you can get by with a simple form with clear problem/solution messaging, like this:
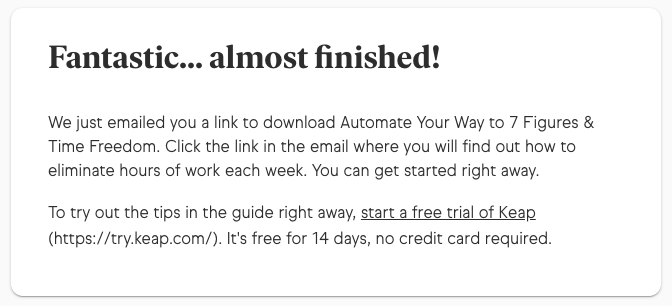
Thank You page – This is the page that displays after the user opts in to receive the lead magnet, letting them know to check their email for the download link. You can also provide the download link right on this page. Keep the copy short and sweet on this one. Here’s a simple example:
To learn more about landing pages for lead magnets, check out the small business guide to creating beautiful landing pages that convert.
Follow-up emails for your lead magnet
For service businesses, the first step in the sales process is usually a free consultation meeting. So you’ll want your lead magnet follow-up series to first deliver the value of the lead magnet and then prompt the lead to schedule a call with you.
Confirmation email – The initial email that includes the download link. Send immediately after opt-in.
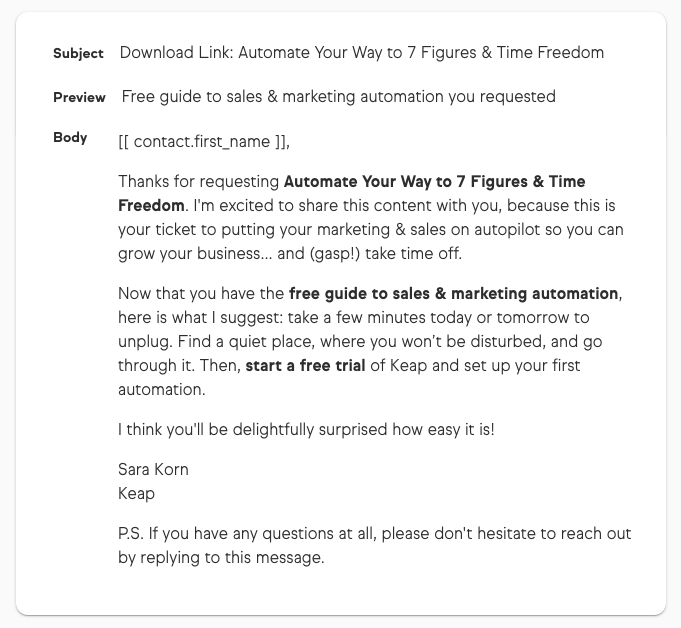
Follow-up email – The first follow-up email (only sent if the user has not yet downloaded the lead magnet). Send 1 day after the initial email.
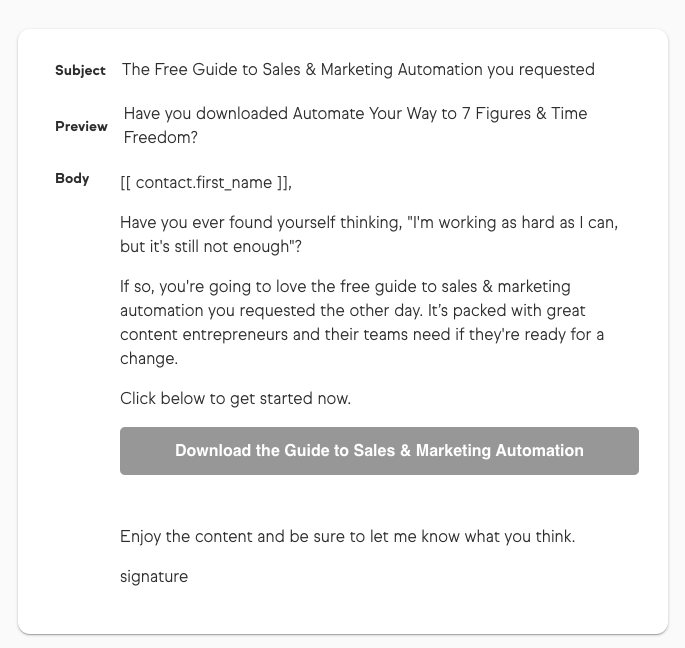
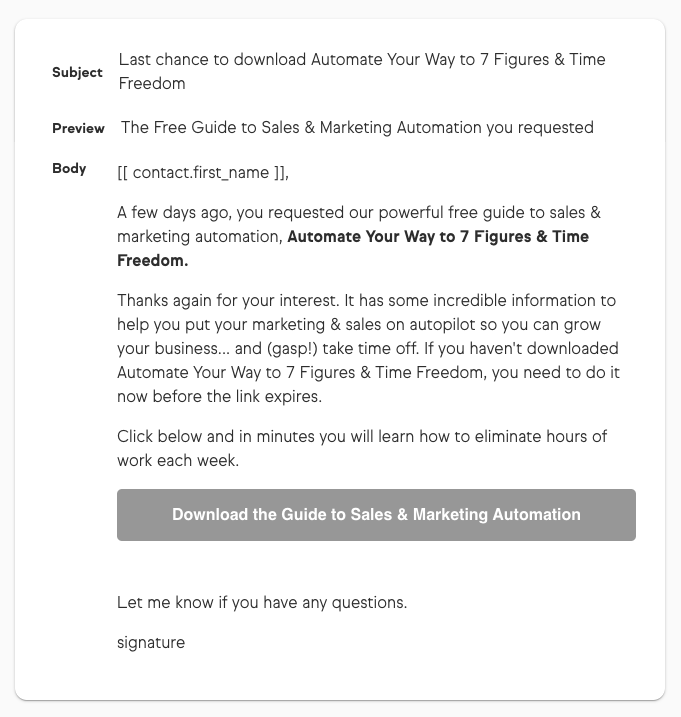
Final email – The second and final follow-up email (only sent if the user has not yet downloaded the lead magnet). Send 5-7 days after the follow-up email.
Follow-up emails for a free consult appointment
After the lead magnet delivery sequence, send leads into an email sequence prompting them to book an appointment with you. You can use Keap, which has a built-in appointment scheduler along with automated email and text messaging.
Booking page – This is a web page with your appointment scheduling widget where leads can pick a time on your calendar that works for them.
Email: Next step is a consultation – Introduces a consultation offer after someone has requested a download. Send 2-3 days after the lead magnet opt in.
Text: Ready for a consultation? – Follows up on the free consult offer presented in the email. Send 1 day after the email.
Email: Why we should connect – Another follow-up that explains the benefits of the consultation. Send 1 day after the text message.
Text: What questions do you have? – Final text reminder about the offer. Send 1 day after the previous email.
Email: Final consultation offer – Final email nudge about registering for a consultation. Send 2 days after the previous text message.
Once you have your content created, the next step is to set it up in sales and marketing automation software like Keap.
How to automate your lead magnet campaign
Creating a landing page with a valuable lead magnet for your leads is one thing, but automating the follow-up with a CRM after they download your lead magnet will take your lead magnet campaign to the next level. The steps to creating this game-changing automation are easy. Here's how.
Set up these components in Keap, or other software of your choice:
- Create a “New lead” tag in the CRM
- Copy your scheduling link from the Appointments feature
- Build your landing pages (lead magnet page, thank you page) using pre-built templates customized to your brand
- Set up an automation for email and text message delivery of lead magnet messages
- Set up an automation for email and text message delivery of free consult messages
How to run the automation:
- Before implementing the automation, test it to make sure everything is working correctly. Once it is, publish the automation in your system.
- Add the “new lead” tag to contacts either as you enter them into your CRM system, or have the tag applied automatically after a person fills out the form on your landing page.
- This triggers the automations, which run automatically from that point. Your work is done!
Easily create your own lead magnet automation
You can give it a try right now for free with a 14-day free trial of Keap. You’ll be surprised just how easy it is to get your lead magnet campaign up and running with the built-in Easy Automations, Appointments tool, and beautiful landing page templates.
If this still sounds like more work than you have time for, consider hiring the marketing automation experts at Keap to build your lead magnet campaign for you — including the lead magnet itself, landing pages, booking page, all the follow-up messages, and even reporting. (If you need an App ID to fill out the form, simply sign up for a free trial of Keap.)
